D.I.Y. No-Bake Claydough Christmas Ornaments
Posted on: December 19, 2021
For the Christmas-rushed, these no-bake claydough ornaments should be on everyone’s “to do” list for the Holidays.
This homemade craft is quick and a cinch for the entire family to make. It’s also more economical and fun to make versus using store bought air-dry clay. This non-toxic (Play-Doh™-like) claydough recipe lets you craft durable, delightful Christmas-themed hand and footprint keepsake ornaments that last for years.
With hand or foot print impressions in the claydough and coloured with paints or markers in all the right places, you can create your own Christmas tree, Reindeer, The Grinch or even Santa ornaments!
Check out my favourite version of the recipe below. These craft supplies can be easily found at Cloverdale’s Dollarama, Metro, Home Hardware and Rexall—#allyouneed at your fingertips.
SUPPLIES:
White craft glue
Cornstarch
White vinegar or lemon juice
Baby oil
Rolling pin
Wooden skewers (5mm)
String or thin ribbon
Acrylic paint or craft paint or tempura paint/Sharpies or markers
Food colouring (optional)
Craft sealant (optional)
RECIPE:
¾ cup (190 mL) white craft glue
1 cup (250 mL) cornstarch (allergic to cornstarch: substitute tapioca starch or rice flour)
1 tbsp (15 mL) lemon juice or vinegar
2 tbsp (30 mL) baby oil
Food colouring (optional, to colour claydough)
Step 1: Mix Dough
- Over medium stovetop heat, thoroughly combine cornstarch and glue in a non-stick pot.
- Stir in the baby oil, and vinegar or lemon juice.
- Turn heat to low, still stirring non-stop until mixture resembles mashed potatoes and pulls away from pot sides.
- Remove pot immediately from heat.
- Turn stove off.
- Transfer claydough to a covered container until cool enough to knead.
- Initially, a sticky dough, so dust work surface and hands generously with cornstarch before rolling out.
- Place claydough onto work surface and knead until pliable and clay-like (if too sticky, add more cornstarch until it feels like Play-Doh™).
- As this claydough dries, it becomes more translucent ivory-white. If you prefer an opaque pure-white, knead a tablespoon of white paint into the claydough.
Step 2: Make Print Impressions
- With a rolling pin, roll out claydough to ⅛ to ¼ inch (3mm to 6mm) thickness, then leave handprint or footprint in it. If bigger prints, claydough should be thicker. Tip: Tape two 5mm skewers to work surface before rolling out to give claydough a uniform thickness.
- Next, carefully cut around the print impression, leaving at least a ¼ inch border.
- With a skewer, make a small hole where the top of your finished image will be, to later tie on a string or ribbon loop.
- Any leftover claydough can be stored tightly wrapped in plastic wrap for up to two weeks in the refrigerator.
- Air-dry ornaments in an open area for three days. To keep flat, flip ornaments every few hours.
Step 3: Colour Your Ornaments
- After three days’ air-dry time, Christmas-theme-colour your print-impression ornaments.
- If you want a coloured ornament border, first colour inside the print impression and let dry completely before applying border colour.
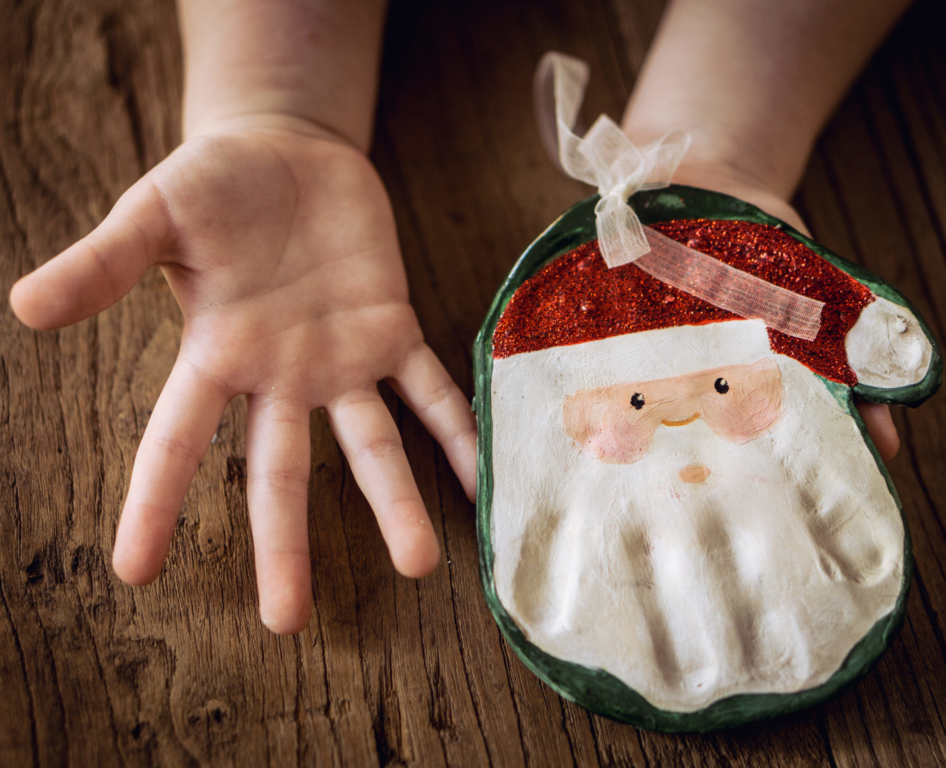
Example: Santa-themed handprint ornament
- Press hand into rolled-out claydough.
- Cut around the handprint, leaving at least a ¼ inch border.
- With skewer, make a small hole between at bottom of hand ornament.
- Let dry for 3 days, then colour in Santa’s face and hat using paint OR markers.
- Let it dry, thread string OR ribbon through the hole, then knot.
To preserve finished ornaments, apply a sealant. I like to use DecoArt Clear Pouring Topcoat™ or Famowood Glaze Coat High Gloss Craft Resin™.
These festive and fun ornaments will provide much joy and fond memories for years to come. Make sure to snap a pic and tag @cloverdalemall with your Christmas keepsake creations.
~ Claudia, Guest Services Representative